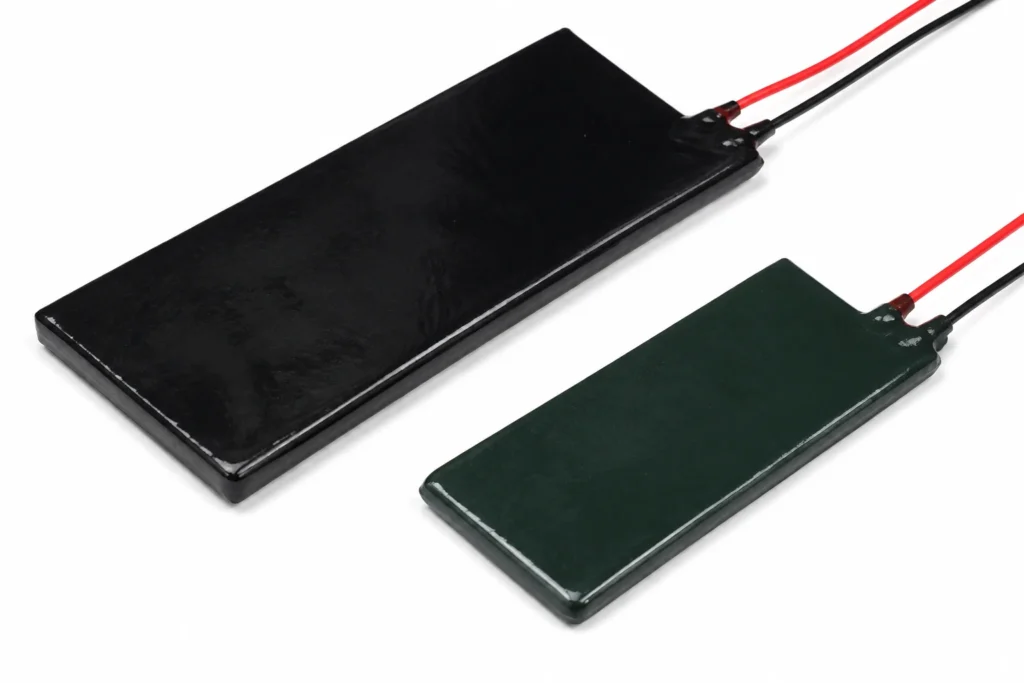
Filled Epoxy Encapsulation: A thermally conductive, electrically insulating potting that locks the element to the plate and seals it against moisture and plating chemistry. Its working range is -40 °C to +150 °C continuous, and that range is the property everything else on the part is designed around, because the element will always outlast the insulation around it.
Filled Epoxy Encapsulation as an Insulation System
A thermally conductive, electrically insulating potting that locks the element to the plate and seals it against moisture and plating chemistry.
| Working range | -40 °C to +150 °C continuous |
|---|---|
| Total thickness in this construction | 6 mm to 15 mm |
| Dielectric withstand | 2500 V AC, 1 minute |
| Insulation resistance | greater than 100 Mu03a9 at 500 V DC |
| Maximum size, one piece | 400 x 600 mm |
The encapsulant is both the insulation and the thermal bond: it holds the element against the plate, seals it from moisture and chemistry, and conducts the heat out. It is also the lowest temperature limit of any construction in this catalogue, and it is the part of the assembly that gives way first.
The Temperature Ceiling, and What Sets It
Working range: -40 °C to +150 °C continuous. The ceiling belongs to the insulation. Nichrome will run red; filled epoxy encapsulation will not, and it is the material around the element that decides what the part is rated at.
This construction is rated 150 °C continuous. That is a continuous figure at the element, not an ambient and not a surface temperature measured somewhere convenient — and it is not a figure that derating extends downwards from something higher. Past the ceiling the insulation degrades, the dielectric strength falls with it, and the failure is electrical rather than thermal.
The boundaries across this catalogue are all material boundaries: PET stops at 120 °C, filled epoxy at 150 °C, silicone rubber and polyimide at 200 °C, and above that only fired and inorganic systems — thick film on stainless or alumina, and mica — are candidates at all.
What Attacks Filled Epoxy Encapsulation
The epoxy, not the element, sets the temperature limit — and it is the lowest limit of any construction here.
What an Epoxy Encapsulated Plate Heaters Is
A flat, rigid, sealed heating plate: element potted in filled epoxy on aluminium, for conduction heating where a flexible heater will not stay flat.
A resistance wire or foil element vacuum potted in thermally conductive filled epoxy against an aluminium or steel plate. Rigid, flat, sealed, and thermally bonded to its own plate so the heat leaves the element through metal rather than through air.
The plate is the thermal path: the element is potted against it, so the metal spreads the heat before the load ever sees it. That is what buys uniformity, and it is also what makes the assembly slow — a bolted plate takes minutes to reach steady state where a film takes seconds.
| Element | resistance wire or foil, vacuum potted |
|---|---|
| Insulation system | thermally conductive filled epoxy |
| Total thickness | 6 mm to 15 mm |
| Maximum size, one piece | 400 x 600 mm |
| Continuous working temperature | 150 °C |
The continuous limit of 150 °C is set by thermally conductive filled epoxy. The element alloy would run far hotter; it is never the element that decides.
Above Its Ceiling: What to Use Instead
The epoxy is the limit at 150 °C, not the element and not the plate. Above it, the same duty is met with a silicone-insulated element bonded or clamped to the plate to 200 °C, or with a fired thick film or a mica-insulated construction beyond that. Below 150 °C the encapsulated plate is hard to beat for sealing and for mechanical robustness.
Attachment and Thermal Contact
The plate is drilled or tapped to your drawing and bolts to the machine. The heated face has to sit flat against the load; where it cannot, a thermal interface pad is worth more than extra wattage.
Allow for expansion. An aluminium plate 400 mm long grows about 1 mm between 20 °C and 130 °C, so a plate bolted rigidly at both ends will bow, and the bow lifts the middle of the heated face away from the load.
From the capability table: Tapped holes, clearance holes, studs or bonded.
The joint between the heated surface and the load carries every watt the element makes. Fill it: an interface pad, a thin film of thermal grease or a bonded assembly. Two dry surfaces bolted together are a thermal resistance, and that resistance appears as element temperature.
Watt Density: the Two Figures
Two watt densities are quoted because there are two thermal situations. With nothing conducting heat away, 0.5 W/cm² is what the insulation survives. Bonded to a heat sink over the full outline, 3 W/cm² is. Anything in between depends on the quality of the joint, and the joint is the customer's to make.
The failure is silent and quick: the element does not know how it is mounted, so at 3 W/cm² in free air the heat simply accumulates in the insulation until it degrades. This is the single most common way these heaters are destroyed, and it happens on the first run rather than after a year.
Control and Protection
This heater has no way of limiting its own temperature. Resistance heating draws roughly the same power whatever the temperature, so with the load removed, the fluid gone, the fan stopped or the sensor open circuit, the element keeps producing watts until something stops it.
The design must therefore contain a control device and, separately, a protective one: a controller with a sensor to hold the set point, and a bimetal thermostat or a one-shot thermal cutoff wired in series with the element to open the circuit if the loop ever fails. The two are not interchangeable — a controller that has lost its sensor cannot protect anything, which is exactly the fault the cutoff exists for.
The limit that matters is the epoxy's, at 150 °C, and it is reached at the element long before the plate face reads anything alarming. Put the limit device in the potting against the element, not on the outside of the plate.
Sensors can be built into the part: NTC thermistor, PT100 or PT1000 RTD, or a K-type thermocouple, fitted under the same insulation and tested with the heater as one assembly. A sensor laminated into the heater reads the heater; a sensor on the load reads the load. Both are legitimate, and the drawing has to say which is wanted.
T
h
How This Construction Fails
- Run at the bonded watt density in free air. The insulation reaches its limit within minutes and the element burns through where the local density is highest. Specify at 3 W/cm² only where the heater is genuinely bonded to metal over its whole area; unbonded, the figure is 0.5 W/cm².
- Loss of the control loop. An open-circuit sensor, a welded relay contact or a controller in manual leaves the element at full power with nothing watching it — the case the series thermal cutoff exists for, and the reason it must not be omitted to save a part.
- Overheating the encapsulant. The epoxy is the weakest link at 150 °C and it fails from the inside, where nothing is measuring; the plate face can look reasonable while the potting against the element is already cooking.
Leads and Terminations
Termination is specified on the drawing: lead length, gauge, insulation and the connector or tag at the end of it.
The lead exit is a thermal discontinuity as well as an electrical one. The joint between a fine element and a stranded lead is the hottest point of many heaters, so it is kept out of the highest watt density zone, strain relieved, and — where the exit sits in a hot area — insulated in PTFE rather than in silicone.
How to Specify One
This is a made-to-drawing part, so there is no catalogue number to quote. A quotation is built from the following, and the more of it that arrives with the enquiry the fewer rounds it takes:
- An outline drawing, or a sketch with dimensions: overall size, holes, cut-outs, radii and the lead exit position.
- The supply voltage, and whether it is AC or DC. The element is wound for one voltage; it is not a switchable range.
- The power required, or — better — the temperature to be reached and the mass or flow it has to be reached in. Given the second, the wattage can be calculated instead of guessed.
- What the heater is attached to, and how. This is what decides which watt density figure applies, and it is the question a quotation cannot proceed without.
- The ambient, and the lowest temperature the assembly must start from. A heater sized for a 20 °C start is undersized for a -30 °C one.
- Duty cycle: continuous, intermittent, or a warm-up to a deadline. Time to temperature is a specification, not a by-product.
- Sensor and protection: which sensor, where it goes, and which limit device is fitted in series with the element.
- The certification the end product is built to, named on the enquiry rather than after approval.
- Quantity and target price, because the construction that is right for fifty pieces is often not the one that is right for fifty thousand.
- The plate material, thickness and mounting hole pattern, and what the plate is bolted to.
Lead time: Samples 7-10 days from approved drawing; production 15-20 days.
Epoxy Encapsulated Plate Heaters — Capability Table
These are process limits for the construction, not the specification of one stocked item. Every line is what the factory can hold; what your part holds is fixed on your drawing.
| Parameter | Specification | Limit / note |
|---|---|---|
| Construction | Resistance wire or foil element potted in thermally conductive filled epoxy on a metal plate | Cured under vacuum so there are no voids in the heat path |
| Plate material | Aluminium 6061, 3 mm to 10 mm | Aluminium for spreading, stainless where the chemistry demands it |
| Total thickness | 6 mm to 15 mm | Plate plus encapsulation |
| Maximum size, one piece | 400 x 600 mm | Larger plates are built as multiple circuits on one plate |
| Dimensional tolerance | u00b10.5 mm on the plate, u00b11 mm on the encapsulation | |
| Supply voltage | 24 V, 48 V, 110 V, 220 V | Wound to order |
| Resistance tolerance | u00b110% | At 20 u00b0C |
| Watt density | 0.5 W/cmu00b2 typical, 3.0 W/cmu00b2 maximum | Against a load in contact; free-standing operation runs far lower |
| Continuous working temperature | -40 u00b0C to +150 u00b0C | Set by the epoxy, not by the element |
| Dielectric strength | 2500 V AC, 1 minute | Element to plate |
| Insulation resistance | greater than 100 Mu03a9 at 500 V DC | Also after 48 hours humidity conditioning |
| Ingress protection | IP65 as standard, IP67 with a moulded lead entry | The encapsulation is the seal |
| Mounting | Tapped holes, clearance holes, studs or bonded | Machined into the plate before potting |
| Sensor options | NTC, PT100 or thermostat potted into the same plate | Reads the plate, which is what the load actually sees |
| Certifications available | UL 499, IEC/EN 60335, RoHS, REACH, CE, IATF 16949 | Construction level |
Capability figures are for resistance elements encapsulated in thermally conductive filled epoxy on a metal plate. The +150 °C continuous limit is a property of the encapsulant, and it is the lowest limit of any construction in this catalog — the element and the plate would both tolerate far more.